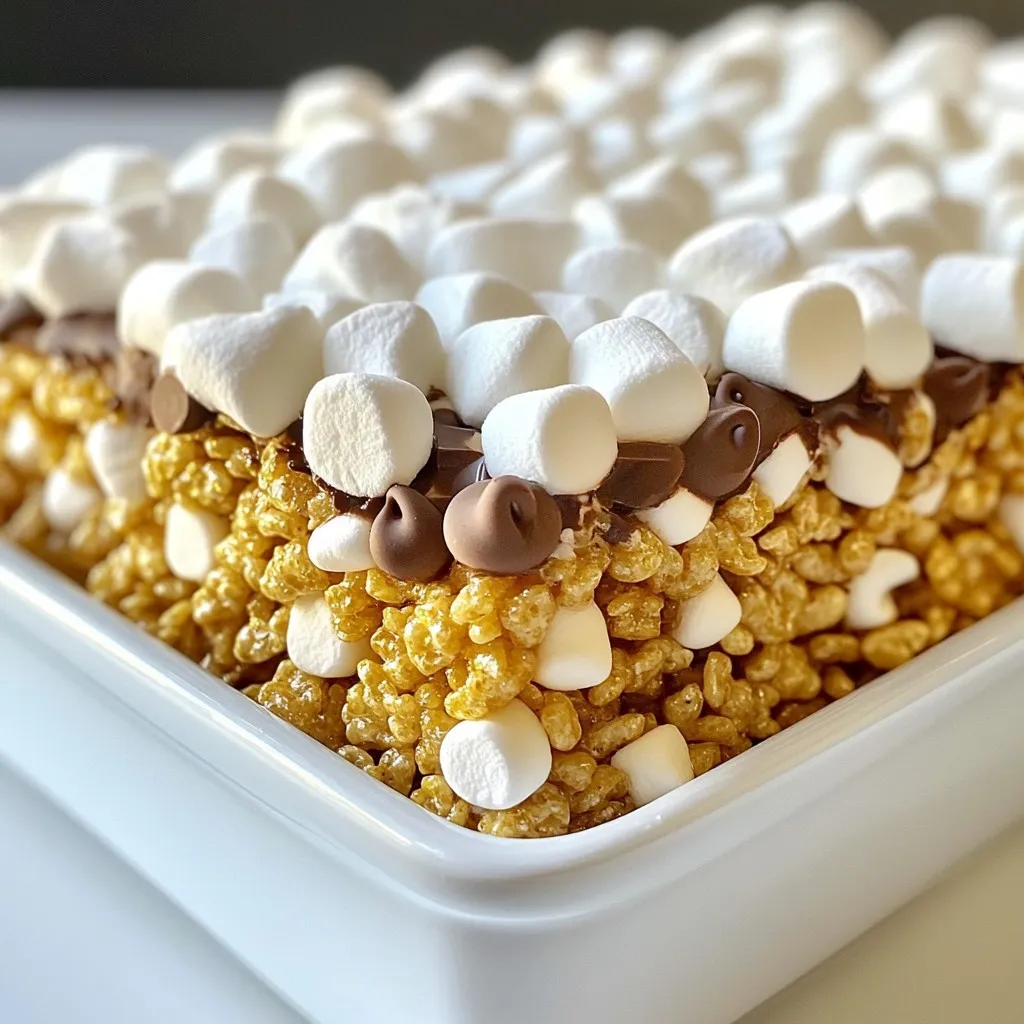
Do you love s’mores? How about Rice Krispie Treats? If you said yes to both, you’ll love this simple recipe! In just a few steps, I’ll show you how to make S’mores Rice Krispie Treats that are gooey, crunchy, and oh-so-delicious. Best of all, you can customize them with your favorite ingredients. Let’s dive into this tasty treat that will spark joy for kids and adults alike!
Why I Love This Recipe
- Irresistible Flavor Combination: The classic combination of chocolate, marshmallows, and graham crackers brings a nostalgic flavor that everyone loves.
- Quick and Easy: This recipe requires minimal time and effort, making it a perfect treat to whip up for any occasion.
- Customizable: You can easily adapt this recipe by adding your favorite mix-ins or toppings, ensuring a unique twist each time you make it.
- Perfect for Sharing: These treats are great for gatherings, parties, or just a sweet snack at home, making them a crowd-pleaser.
Ingredients
List of Essential Ingredients
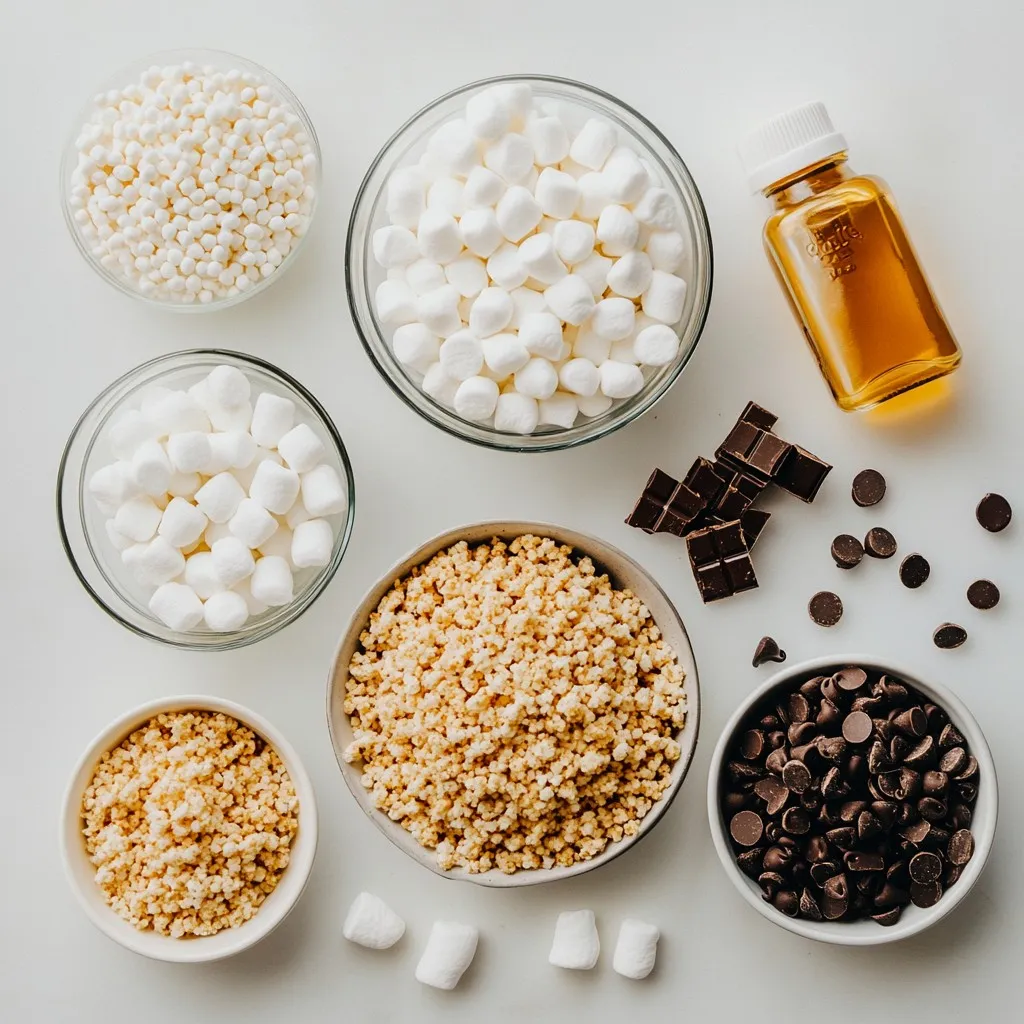
To make S’mores Rice Krispie Treats, you need some key ingredients. Here’s what you will need:
– 5 cups Rice Krispies cereal
– 1 bag (10 oz) mini marshmallows
– 1/4 cup unsalted butter
– 1 cup graham cracker crumbs
– 1/2 teaspoon pure vanilla extract
– 1 cup chocolate chips (semi-sweet or milk chocolate)
– Extra mini marshmallows for topping
These ingredients create a tasty balance of flavors and textures.
Optional Ingredients for Customization
You can change your S’mores Rice Krispie Treats by adding personal touches. Here are some fun ideas:
– Peanut butter for a nutty flavor
– Sea salt for a sweet and salty vibe
– Toasted coconut for a tropical twist
– Different types of chocolate chips, like dark or white chocolate
These options can make your treats unique and exciting!
Recommended Ingredient Brands
Using quality ingredients makes a big difference. Here are some brands I trust:
– Rice Krispies: Kellogg’s is a classic choice.
– Mini marshmallows: Jet-Puffed mini marshmallows melt well.
– Unsalted butter: Look for Land O’Lakes for great flavor.
– Graham crackers: Honey Maid offers a nice sweetness.
– Chocolate chips: Ghirardelli or Nestlé are both reliable options.
Choosing these brands can help you achieve the best taste and texture in your treats!
Step-by-Step Instructions
Preparation of Baking Dish
Start by greasing a 9×13 inch baking dish. You can use butter or non-stick spray. This step keeps the treats from sticking when you cool them.
Melting Butter and Marshmallows
In a large saucepan, melt 1/4 cup of unsalted butter over medium heat. Once it’s melted, add in a 10 oz bag of mini marshmallows. Stir until they’re all melted. You want a smooth and gooey mixture. Remove the pan from heat when done.
Mixing in Vanilla and Graham Cracker Crumbs
Next, stir in 1/2 teaspoon of pure vanilla extract. Now add 1 cup of graham cracker crumbs. Mix well until everything is combined. It should feel thick and sticky, like caramel.
Combining Rice Krispies Cereal
Gradually fold in 5 cups of Rice Krispies cereal. Use a gentle motion to coat each piece with the marshmallow mix. The texture should be sticky but hold together well.
Incorporating Chocolate Chips
Now, fold in 1 cup of chocolate chips. Make sure they are evenly spread out. You can save some to sprinkle on top later for a nice look.
Transferring Mixture to Baking Dish
Carefully pour the mixture into the prepared baking dish. Use a spatula or parchment paper to press it down firmly. This helps make a nice, even layer.
Adding Finishing Touches
Sprinkle extra mini marshmallows and any reserved chocolate chips on top. Lightly press them into the surface so they stick.
Cooling and Slicing
Let the treats cool at room temperature for about 30 minutes. This helps them firm up. Once cool, use a sharp knife to cut them into squares or rectangles.
Serving Suggestions
These treats are best enjoyed warm. You can also store them in an airtight container for up to a week. They make a great snack anytime! For a fun twist, serve on a colorful platter and drizzle melted chocolate on top before cutting.
Tips & Tricks
How to Achieve Perfect Texture
To get the best texture in your S’mores Rice Krispie Treats, you must mix well. After melting the butter and marshmallows, stir until smooth. When adding the Rice Krispies, fold gently. This keeps them crispy. If you press too hard, the treats become dense. A light touch ensures they stay fluffy.
Common Mistakes to Avoid
One common mistake is not greasing the dish enough. If you skip this step, your treats will stick. Another mistake is using too many marshmallows. This can make your treats overly gooey. Stick to the recipe for balance. Finally, don’t rush the cooling process. Let them cool for at least 30 minutes. This helps them set properly.
Suggestions for Storing Leftovers
To keep your S’mores Rice Krispie Treats fresh, use an airtight container. They last up to a week. Place parchment paper between layers to avoid sticking. If they get hard, simply microwave them for a few seconds. This will soften them up again. Enjoy your treats at any time!
Pro Tips
- Use Fresh Ingredients: Always ensure your marshmallows and chocolate chips are fresh for the best flavor and texture in your treats.
- Customize Your Chocolate: Feel free to mix different types of chocolate chips, like dark and white chocolate, for a unique flavor combination.
- Press Firmly: When transferring the mixture to the baking dish, press it down firmly to create dense, chewy squares that hold together well.
- Experiment with Mix-Ins: Add in nuts, peanut butter, or other favorite candies to create your own twist on these classic treats.
Variations
Peanut Butter S’mores Rice Krispie Treats
You can add peanut butter for a tasty twist. Start by melting 1/2 cup of creamy peanut butter with the butter and mini marshmallows. This adds a rich flavor and a creamy texture. Mix in the Rice Krispies and chocolate chips as usual. The peanut butter brings a new layer of taste to the classic treat.
Healthy Alternative Ingredients
For a healthier version, swap out the regular butter for coconut oil. Use natural peanut butter instead of the creamy kind. You can also switch mini marshmallows for a healthier brand or use homemade marshmallows. Choose dark chocolate chips for less sugar. These changes keep the fun while making it a bit better for you.
Seasonal Flavor Add-Ins
You can change the flavors based on the seasons. In fall, add pumpkin spice to the mix. In winter, try peppermint extract for a fresh taste. In summer, mix in fresh berries or lemon zest. These seasonal flavors make your S’mores Rice Krispie Treats fun and festive all year round. Get creative with your choices!
Storage Info
Best Practices for Freshness
To keep your S’mores Rice Krispie Treats fresh, store them in an airtight container. This helps to keep them soft and chewy. Do not expose them to air, as this can make them hard. Place a piece of wax paper between layers if stacking. This way, they won’t stick together.
How Long They Last
When stored properly, these treats can last up to a week. They taste best within the first few days. After that, they may lose some of their gooey texture, but they still taste great. If you notice they are getting dry, a quick zap in the microwave can bring back some softness.
Freezing Instructions
You can freeze S’mores Rice Krispie Treats for longer storage. Wrap them tightly in plastic wrap, then place them in a freezer bag. They can last up to three months in the freezer. When you’re ready to eat, thaw them in the fridge overnight. Enjoy them as a sweet treat any time!
FAQs
Can I use regular marshmallows instead of mini?
Yes, you can use regular marshmallows. You will need about 10-12 large marshmallows. Just make sure to melt them fully. They will give the same yummy flavor. The texture may be slightly different but still delicious.
How do I make these treats gluten-free?
To make these treats gluten-free, use gluten-free Rice Krispies. Check the label on the graham crackers too. Many brands offer gluten-free options. This way, everyone can enjoy them!
Can I add nuts or other toppings?
Absolutely! You can add nuts like walnuts or pecans. You can also try other toppings like crushed candy bars or sprinkles. Just fold them into the mixture before pressing it into the dish. This adds crunch and fun flavors.
What is the best way to cut Rice Krispie Treats?
The best way to cut the treats is with a sharp knife. Lightly grease the knife with butter or cooking spray. This helps the knife glide through the treats. Cut them into squares or rectangles while they are still slightly warm.
Are S’mores Rice Krispie Treats suitable for children?
Yes, S’mores Rice Krispie Treats are great for kids! They are fun, sweet, and easy to eat. Kids love the gooey marshmallows and chocolate. Just be sure to keep an eye on young ones while enjoying this treat!
You now know the key ingredients and steps for making S’mores Rice Krispie Treats. We covered essential tips, variations, and storage options. These treats are easy to customize for any taste. Remember to avoid common mistakes for the best texture. With a bit of creativity, you can make them your own. Enjoy these treats at any gathering. They are sure to please everyone. Now, grab your ingredients and start creating sweet memories toda