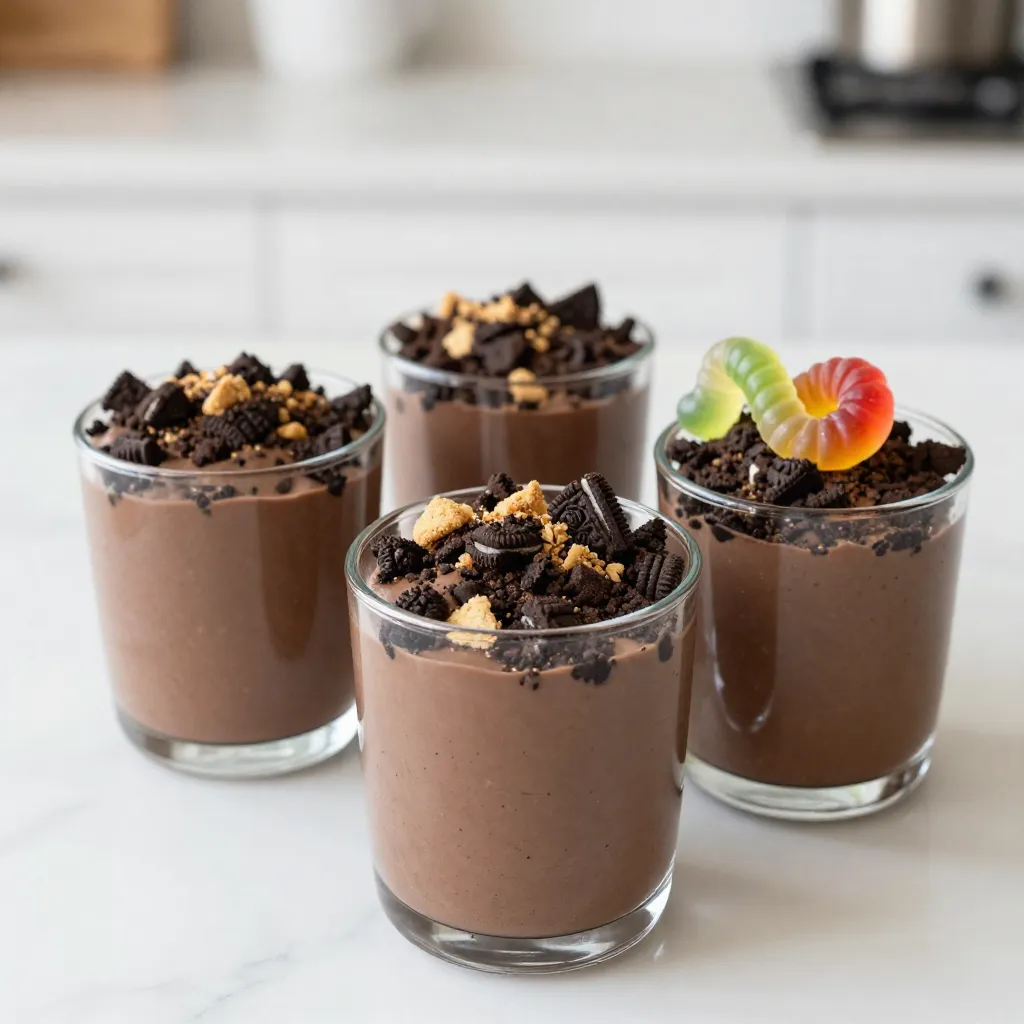
If you’re looking for a fun and easy dessert, Oreo Dirt Pudding Cups are the answer! This tasty treat mixes creamy layers with crispy Oreos for a sweet delight everyone will love. Whether you’re cooking with kids or just want a simple snack, these cups are perfect. Join me as I share how to make these delicious, layered desserts that will impress your family and friends!
Why I Love This Recipe
- Fun and Playful: These Oreo Dirt Pudding Cups are not only delicious but also visually fun, making them a hit for kids and adults alike.
- Easy to Assemble: With simple steps and minimal cooking, you can whip these up quickly, perfect for last-minute gatherings or dessert cravings.
- Customizable: The layers and toppings can be easily adjusted to suit your preferences, allowing for endless variations and creativity.
- Chilled Delight: These cups are best served chilled, making them a refreshing treat, especially during warm weather or summer parties.
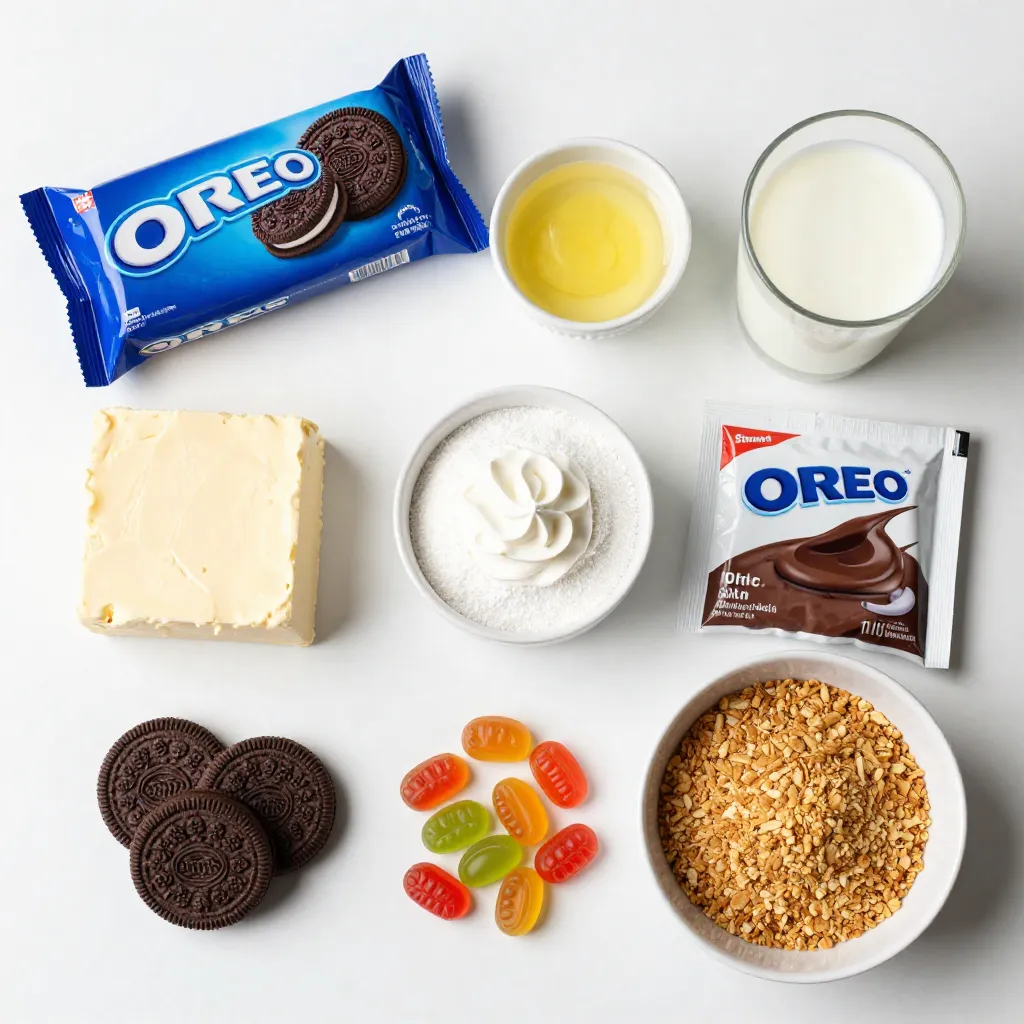
Ingredients
List of Ingredients for Oreo Dirt Pudding Cups
– 1 package (18 oz) Oreo cookies
– 1/2 cup unsalted butter, melted
– 1 package (8 oz) cream cheese, softened
– 1 cup powdered sugar
– 1 cup whipped topping (like Cool Whip)
– 2 cups milk
– 1 package (3.9 oz) instant chocolate pudding mix
– Gummy worms (for garnish)
– Edible soil or crushed graham crackers (for topping)
Ingredient Substitutions
If you have allergies or need swaps, here are some ideas:
– Use gluten-free Oreos for a gluten-free option.
– Swap cream cheese with non-dairy cream cheese if needed.
– Instead of Cool Whip, you can use homemade whipped cream.
– You can replace the chocolate pudding mix with vanilla for a twist.
Optional Add-ins for Enhanced Flavor
Want to make your pudding cups even more fun? Try these:
– Add a splash of vanilla extract to the cream cheese mix.
– Mix in some peanut butter for a rich taste.
– Add mini chocolate chips for extra texture and sweetness.
– Use crushed nuts or sprinkles to add crunch and color.
These ingredients and options make your Oreo Dirt Pudding Cups fun and flexible. You can create a treat that matches your taste and needs. Enjoy crafting this simple dessert!
Step-by-Step Instructions
How to Crush Oreo Cookies
To start, you need to crush the Oreo cookies. You can use a food processor for this. Just pulse until they turn into fine crumbs. If you don’t have a food processor, grab a zip-top bag. Place the cookies inside and seal it. Use a rolling pin to crush them into crumbs. This method is fun and hands-on.
Preparing the Cream Cheese Base
Next, you will make the cream cheese base. In a medium bowl, mix the crushed Oreos with melted butter. Stir until it looks like wet sand. Set aside one cup of this mixture for later. In a large bowl, beat the softened cream cheese with an electric mixer. Add powdered sugar slowly. Mix until smooth and creamy. This step gives your dessert a sweet base.
Layering the Pudding Cups
Now it’s time to layer the pudding cups. Start with your serving cups. Add a layer of the Oreo crust at the bottom. Then, spoon in a layer of the chocolate pudding mixture. Repeat these layers until the cups are full. End with a layer of pudding on top. Finally, sprinkle the reserved Oreo crust on each cup. For extra fun, add crushed graham crackers on top. Place gummy worms sticking out for a dirt effect. Your Oreo Dirt Pudding Cups will look amazing and taste even better!
Tips & Tricks
Best Methods for Crushing Oreos
Crushing Oreos is easy and fun! You can use two main methods:
– Food Processor: Just add cookies and pulse until you get fine crumbs.
– Zip-Top Bag and Rolling Pin: Place Oreos in a bag and roll over them. This is great for kids!
Both methods work well, but I love the hands-on approach. It makes the process feel more special.
How to Achieve the Perfect Creamy Texture
The key to a creamy texture is all in the mixing. Start with softened cream cheese. If it is too cold, it won’t blend well. Here’s how to get it right:
– Beat Cream Cheese: Use an electric mixer to whip it until smooth.
– Add Powdered Sugar Gradually: This helps avoid lumps. Mix on low speed to keep it fluffy.
– Fold in Whipped Topping: Gently fold it in. Over-mixing can make it dense.
This careful mixing gives you a light, creamy filling that pairs perfectly with the Oreo crust.
Presentation Ideas for Oreo Dirt Pudding Cups
Make your Oreo Dirt Pudding Cups look as good as they taste! Here are some fun ideas:
– Clear Glasses: Use clear cups to show off those tasty layers.
– Playful Toppings: Add gummy worms on top for a fun touch.
– Edible Soil: Sprinkle crushed graham crackers for a realistic dirt look.
These simple tweaks will wow your friends and family, making dessert even more exciting!
Pro Tips
- Crushing Oreos: For a finer texture, try using a food processor. If you prefer a more hands-on approach, use a rolling pin on a zip-top bag for a fun activity!
- Chill Time: Allow the assembled cups to chill for at least 2 hours. This helps the layers set properly, enhancing both flavor and texture.
- Layering Technique: When layering, press each layer down gently. This ensures the layers stay distinct and beautiful when served.
- Garnish Wisely: Use different toppings like crushed graham crackers or edible soil to create visual interest and a variety of textures!
Variations
Flavor Variations (e.g., Peanut Butter, Mint)
You can easily switch up the flavor of your Oreo Dirt Pudding Cups. For a peanut butter twist, mix in half a cup of peanut butter into the cream cheese mixture. This adds a rich, nutty taste. If you prefer mint, use mint-flavored Oreo cookies. You can also add a drop of mint extract to the pudding or cream cheese mix for a refreshing zing.
Gluten-Free Options
If you want to make a gluten-free version, use gluten-free Oreo cookies. These cookies have a similar taste and texture, so you won’t miss out. Make sure to check other ingredients, like the pudding mix and whipped topping, to ensure they are also gluten-free.
Kids-Friendly Additions
Kids love to get creative, so let them help with the toppings! You can add colorful sprinkles for fun. Mini chocolate chips can add a crunch, too. You can even use gummy insects instead of gummy worms for a spooky twist. These fun additions can make the dessert even more exciting for young ones.
Storage Info
How to Store Leftover Pudding Cups
To keep your Oreo Dirt Pudding Cups fresh, place them in the fridge. Use an airtight container or cover each cup with plastic wrap. This method helps maintain their creamy texture and flavor. If you have extra pudding mix, store it in a separate container.
Shelf Life of Oreo Dirt Pudding Cups
Oreo Dirt Pudding Cups last about 3 to 5 days in the fridge. After this time, the layers may lose their texture. Always check for any signs of spoilage before serving. If they look or smell off, it’s best to toss them.
Freezing Tips and Considerations
You can freeze Oreo Dirt Pudding Cups, but some textures may change. To freeze, cover them tightly with plastic wrap or foil. They will stay good for about 2 months. When ready to eat, thaw them overnight in the fridge. Avoid refreezing after thawing to keep the best taste.
FAQs
Can I make Oreo Dirt Pudding Cups in advance?
Yes, you can make Oreo Dirt Pudding Cups ahead of time. I recommend making them a day before. This lets the flavors blend well. Just keep them covered in the fridge until serving. They will taste even better after chilling overnight!
What can I use instead of Cool Whip?
If you don’t have Cool Whip, you can use whipped cream. Just whip heavy cream until soft peaks form. You can also use store-bought whipped cream. Another option is to make your own by mixing cream cheese with a little milk and sugar.
How long should I chill the pudding cups before serving?
Chill the pudding cups for at least 2 hours. This helps the layers set nicely. If you can wait longer, it’s even better. Chilling makes the dessert rich and creamy, enhancing the taste and texture. Enjoy your delicious treat!
Oreo Dirt Pudding Cups are a fun and tasty treat. We covered the essential ingredients, including tasty substitutions and add-ins. I shared easy, step-by-step instructions for creating the cups, from crushing Oreos to layering the pudding. You learned useful tips for texture and presentation, along with delicious flavor variations. Don’t forget how to store leftovers properly. Overall, these cups are perfect for gatherings or just a fun dessert. Enjoy making them your wa