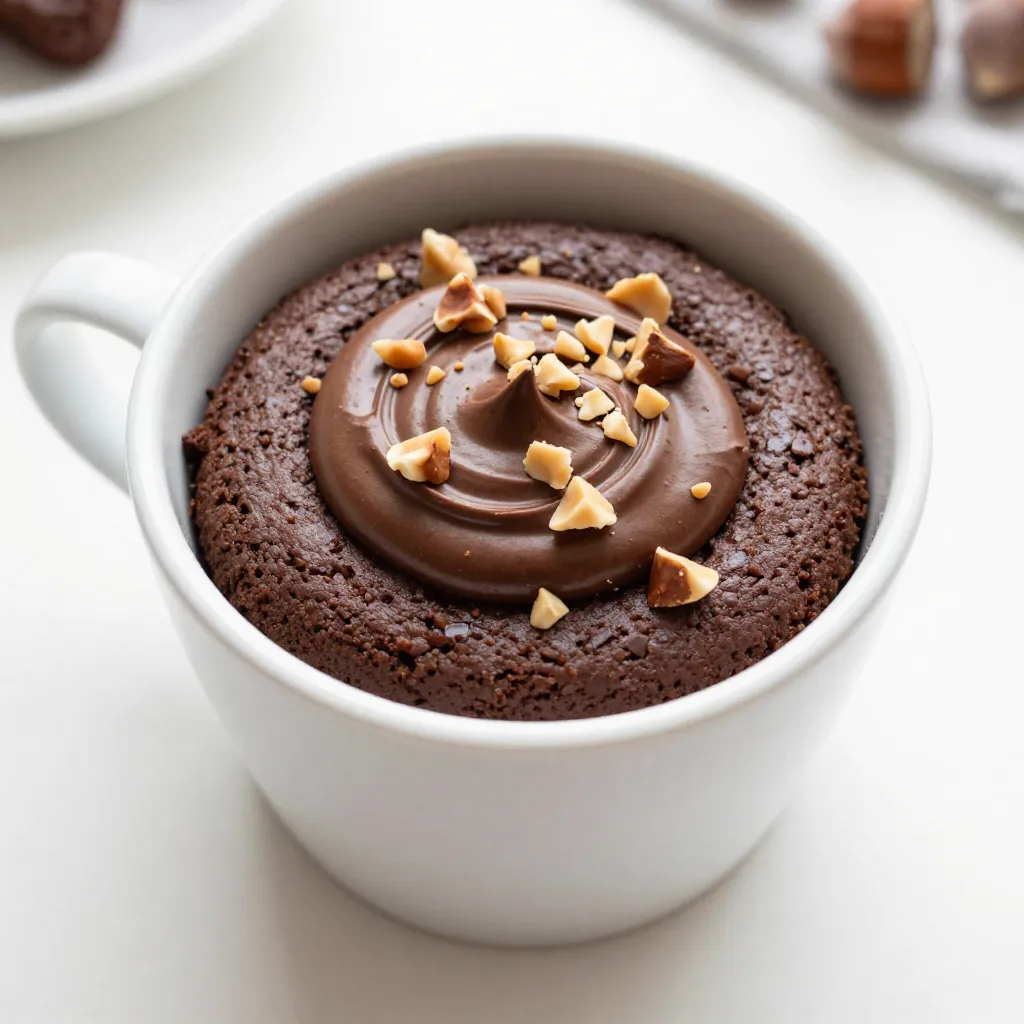
Craving something sweet but short on time? You’re in luck! This Chocolate Hazelnut Mug Cake is quick, easy, and oh-so-delicious. In just a few minutes, you can enjoy a warm, gooey treat right from your microwave. I’ll walk you through each step, from gathering the simplest ingredients to perfecting that dreamy texture. Let’s satisfy your sweet tooth with this delightful mug cake recipe!
Why I Love This Recipe
- Quick and Easy: This mug cake can be made in just 5 minutes, making it a perfect last-minute dessert option.
- Decadent Flavor: The combination of chocolate and hazelnut spread creates a rich, indulgent flavor that satisfies any sweet tooth.
- Single Serving: This recipe is designed for one, so you can enjoy a delicious treat without the temptation of leftovers.
- Customizable Toppings: You can personalize your mug cake with your favorite toppings like whipped cream or more hazelnuts for an extra crunch.
Ingredients
List of Ingredients
– 4 tablespoons all-purpose flour
– 3 tablespoons granulated sugar
– 2 tablespoons unsweetened cocoa powder
– 1/8 teaspoon baking powder
– 1/8 teaspoon fine salt
– 3 tablespoons milk (any type)
– 1 tablespoon vegetable oil (or melted butter)
– 1 teaspoon vanilla extract
– 2 tablespoons chocolate hazelnut spread (plus more for topping)
– A handful of chopped hazelnuts (for topping)
Substitutions for Ingredients
You can swap all-purpose flour with a gluten-free blend. If you need a lower sugar option, try using a sugar substitute. For a dairy-free version, use almond milk or oat milk instead of regular milk. If you want more richness, feel free to use melted butter instead of vegetable oil. For a nut-free option, skip the hazelnuts altogether.
Measuring Tips for Accurate Portions
Using the right tools helps make sure your cake turns out great. Use dry measuring cups for flour and sugar. Level off the top with a knife for accuracy. When measuring liquids, use a clear measuring cup with markings. Pour until you reach the desired line. For small amounts like baking powder, use a measuring spoon and level it off as well. Accurate measuring gives you a perfect mug cake every time!

Step-by-Step Instructions
Preparation of the Mug and Ingredients
Start with a microwave-safe mug. Choose one that holds about 12 ounces. Add the dry ingredients:
– 4 tablespoons all-purpose flour
– 3 tablespoons granulated sugar
– 2 tablespoons unsweetened cocoa powder
– 1/8 teaspoon baking powder
– 1/8 teaspoon fine salt
Mix these well with a fork. You want a smooth blend without lumps. This step is key to a great cake.
Mixing the Batter
Next, add the wet ingredients:
– 3 tablespoons milk (any type works)
– 1 tablespoon vegetable oil (or melted butter for a richer taste)
– 1 teaspoon vanilla extract
Stir until the batter is smooth. No dry bits should remain. Then, take 2 tablespoons of chocolate hazelnut spread. Spoon it into the center of the batter. Use your fork to swirl it in gently. This creates a gooey center in your cake.
Cooking Time and Microwave Tips
Now, place your mug in the microwave. Cook it on high for 1 minute and 10 seconds. Microwaves differ, so keep an eye on it. If the cake looks wet, you can add a few extra seconds. Be careful not to overcook.
Once done, take the mug out. It will be hot! Let it cool for about 1 minute. For added crunch, sprinkle chopped hazelnuts on top. If you want more chocolate, add a spoonful of hazelnut spread. Enjoy your warm, delicious mug cake!
Tips & Tricks
How to Achieve the Perfect Texture
To get a soft and fluffy mug cake, mix well. Use a fork to blend your dry and wet ingredients thoroughly. Make sure no dry flour remains in the batter. Swirl the chocolate hazelnut spread carefully into the batter. This creates a gooey center that adds richness. Also, don’t overcook the cake. Microwaves vary, so start with 1 minute and 10 seconds. Check if it’s set, and adjust the time if needed.
Common Mistakes to Avoid
One common mistake is not measuring accurately. Use proper measuring cups and spoons for each ingredient. Another mistake is overmixing the batter. Mixing too much can lead to a dense cake. Be gentle when combining ingredients. Lastly, avoid using a mug that’s too small. A 12 oz mug works best to prevent overflow while cooking.
Enhancements for Flavor and Texture
Want to boost flavor? Consider adding a pinch of cinnamon or coffee to the batter. Both enhance the chocolate taste. You can also swap out the vegetable oil for melted butter for a richer flavor. For extra texture, toss in mini chocolate chips or chunks. They melt beautifully and make each bite even more decadent. Sprinkle more chopped hazelnuts on top for a crunchy finish. Enjoy your creation with a scoop of ice cream for a special treat!
Pro Tips
- Use a larger mug: If you’re unsure about the capacity of your mug, opt for a larger one to prevent overflow while cooking.
- Experiment with flavors: Feel free to swap in different nut spreads or add a pinch of cinnamon or espresso powder for a unique twist!
- Check microwave wattage: Microwaves vary in power; if your cake isn’t fully set after 1 minute and 10 seconds, add time in 10-second increments.
- Serve warm: For the best experience, enjoy your mug cake warm, ideally paired with ice cream or whipped cream for added indulgence.
Variations
Gluten-Free Option
You can make this mug cake gluten-free. Just swap the all-purpose flour for a gluten-free blend. Many brands work well in baking. Look for a blend that has xanthan gum for the best results. This swap keeps your cake moist while still being fluffy.
Vegan Adaptation
To make a vegan mug cake, replace the milk with a plant-based milk. Almond, soy, or oat milk all work great. Use coconut oil instead of vegetable oil for a slight coconut taste. Lastly, choose a vegan chocolate hazelnut spread. Many brands offer tasty options that fit perfectly in this recipe.
Flavor Add-Ins and Toppings
You can customize your mug cake with fun flavors. Mix in a pinch of cinnamon or espresso powder for added depth. If you want a fruity twist, try adding a spoonful of peanut butter or almond butter. For toppings, I love adding chopped hazelnuts for crunch. You can also drizzle more chocolate hazelnut spread on top for extra indulgence. For a fresh touch, add fresh berries or a scoop of ice cream.
Storage Info
Storing Leftovers
If you have any mug cake left, store it in an airtight container. This keeps it fresh. You can place it in the fridge for up to two days. Remember to cover it well to avoid drying out. If you prefer, you can also wrap it tightly in plastic wrap.
Reheating Instructions
To reheat your mug cake, place it back in the microwave. Start with 10 to 15 seconds. Check to see if it is warm enough. If not, heat it for a few more seconds. Avoid overheating, as the cake may become tough. Enjoy your warm treat!
Making Ahead for Convenience
You can prepare the dry ingredients ahead of time. Mix the flour, sugar, cocoa powder, baking powder, and salt in a bowl. Store this mix in a jar for easy access. When you want a quick dessert, just add the wet ingredients. This saves time and makes it easy to whip up a tasty treat!
FAQs
How do I know when the mug cake is done?
You can tell when your mug cake is done by looking at its top. It should look set and not wet. A toothpick works well too. Insert it into the center. If it comes out clean, your cake is done. If it has batter on it, cook for a few more seconds. Microwaves can vary, so check often.
Can I use different types of chocolate spread?
Yes, you can use different types of chocolate spread. Brands like Nutella or store brands work well. Each type brings its own flavor. You might notice a change in sweetness or richness. Feel free to try different spreads. It keeps your mug cake exciting and new!
What can I do with leftover hazelnuts?
Leftover hazelnuts can be used in many ways. You can chop them for toppings on salads or oatmeal. They also work well in baked goods like cookies or brownies. Try adding them to granola or trail mix for extra crunch. Roasting them brings out their flavor, making them even tastier!
This blog post covered all you need to make a great mug cake. You learned the right ingredients, substitutions, and measuring tips for success. We detailed step-by-step instructions on preparing, mixing, and cooking. I shared tips for texture and common mistakes to avoid. You saw options for gluten-free and vegan adaptations. Finally, you discovered storage tips and answers to FAQs.
Now you can make delicious mug cakes anytime with confidence. Enjoy your baking journe